You don’t drive a vehicle without putting on your seat belt. You don’t go to bed at night without locking your doors. You don't leave home without checking that your cell phone is charged in case of an emergency.
These good habits make our lives easier and safer. Gas detection also has a set of safe and simple practices like these. Gas detectors require some simple checks to ensure that they'll protect you when you need it most.
What is a bump test?
A bump test is a simple process where you expose sensors in a gas detector to an expected concentration of gas that is greater than the alarm set points. If everything is working as expected, the gas detector will go into alarm. Bump testing is the only way to ensure that a gas detector's sensors and alarms are working.
Bump testing a gas detector like checking that a flashlight works before relying on it in the dark. If the flashlight does not turn on, you know that the one you have cannot help you. Gas detectors are no different. The first thing you should do before using your gas detector is make sure it works. Without a bump test, you can't know that the gas detector will perform the way you need it to. If the bump test fails, you know that you'll need to troubleshoot.
However, bump tests do not check for accuracy. To check for accuracy, you must calibrate the gas detector.
Why is bump testing important?
Gas detectors are made to survive harsh environments. They are often dropped, exposed to extreme temperatures, humidity, moisture, dust, mud, and sludge. Any of these can influence a gas detector’s performance. Dropping a monitor can dislodge sensors. Moisture and dust can clog filters. Mud or sludge can block a sensor from detecting gas. All of these are common in a day's work, so manufacturers recommend bump testing gas detectors before each use.
How does bump testing work?
For toxic and combustible sensors, the typical output in clean air is zero, whether reading in parts per million (PPM), percent of lower explosive limit (LEL), or percent by volume. One main exception to this is an oxygen sensor, which should read around 20.9% volume in ambient air. So bump testing a standard four-gas instrument will drive the gas readings up on your toxic and combustible sensors, while driving the reading for the oxygen sensor down.
The problem is that toxic and combustible sensors will generally read zero in an ambient environment whether they are functioning or not. Therefore, the only way to know if the sensors will respond to gas is by exposing them to gas in a bump test.
How do I bump test my gas detector?
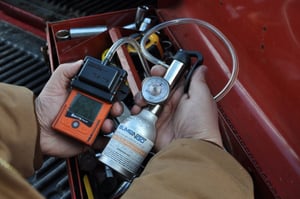
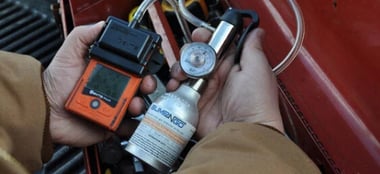
Bump-N-Go cylinders make it easy to bump test
without access to a docking station. The
miniature cylinders are only 3.8 inches (97 mm)
tall and provide up to 250 bump tests. The
cylinders have a one-year shelf life and are
available for single-gas CO and H2S monitors
as well as standard 4-gas (CO, H2S, O2, LEL) instruments.
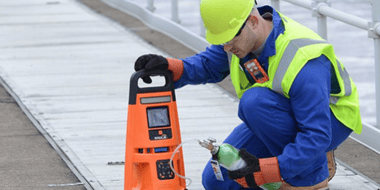
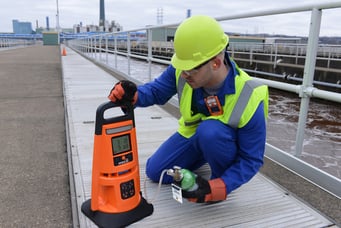
Because of the broad range of gas detector applications, you have different options for how you bump test your gas detectors. The easiest and most efficient way to bump test is by using docking stations. Docking stations draw gas through a connected cylinder, and then apply that gas to the detector that is docked. Docking stations can also charge, calibrate, and perform various other maintenance tasks while gas detectors are docked, making them a great option for keeping gas detectors in prime condition. Docking stations are often connected to gas detection management software. Through this software, you can schedule bump tests to start automatically every day. If a failure occurs, the software can notify the user or safety manager, so they know what to do next.
You can also perform manual bump tests by using a gas bottle, a regulator, tubing, a calibration cup (if using a diffusion instrument), and a gas detector. To do this, put the gas detector into bump test mode, then apply the gas. The gas detector will either cycle through each individual sensor or do them all at once, depending on the gas detector's settings. After the test is complete, the monitor will display results, showing whether it passed or failed the bump test.
Alternatively, you can perform a manual bump test simply by applying gas to the instrument while it is on the main gas reading screen. If each sensor shows readings in response to the gas and the detector goes into alarm, then that instrument is good to go.
What are the challenges of bump testing?
Bump testing can create some challenges. Most common is that workers forget to bump test before each shift. Docking stations offer a simple fix. Make it a standard practice to place gas detectors on a docking station after each shift, that way you know monitors will always be charged, bump tested, and ready to go for the next shift.
The number of gas detectors you have, the applications, and locations of equipment can also present challenges. For this reason, gas cylinders come in a variety of sizes. You may need larger cylinders to connect to docking stations that serve many workers. You may also need smaller, more portable cylinders to bump test instruments when workers are on the go. Luckily, there are cylinder options to fit your application. Cylinders come in all shapes and sizes, and come in specific gas blends for all types of sensors.
Another challenge of bump testing gas detectors is training. It's often difficult for safety managers to find time to train users, and workers often do not have time to train one another. Luckily, gas detection companies offer a wide array of training resources. Trainers can travel to customer locations for on-site training to give a more hands-on approach. Alternatively, gas detection companies post videos, articles, and many other resources to help you learn how to use gas detectors safely and effectively.
Bump testing saves lives.
The bottom line is that bump testing saves lives. You should never use a gas detector without checking to make sure it is functioning. With the right training, understanding, and repetition, bump testing a gas detector can become as routine as putting on a seat belt when you get into your car. It is just as important, so make it a priority before you start each shift.

